Configuring Quick Pay
Quick Pay allows users to make a payment without logging into the system. Two steps are required to configure this setup:
-
Create a web page using the Quick Pay Purchase web content.
-
Enable Quick Pay in the Configurations App.
Once quick pay is configured, visitors to the Quick Pay web page can submit a payment using a quick pay code OR by entering the order/invoice number they wish to pay.
Configuring the Quick Pay Web Page
-
Navigate to the Web Sites App > Web Sites feature.
-
Click the New Page button.
-
In the newly created page, configure necessary Page Settings and Page Visibility, as normal.
-
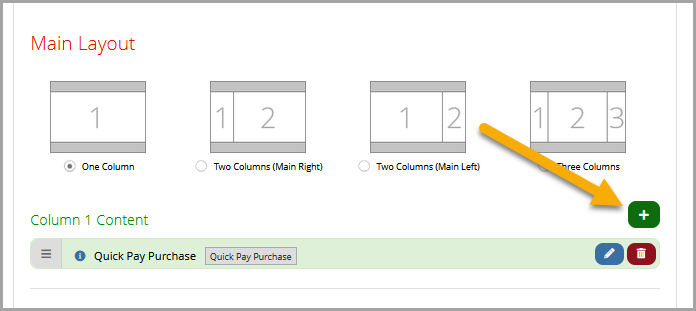
In the Page Content tab > Main Layout section, click the Add button to add a new item of web content to the page.
-
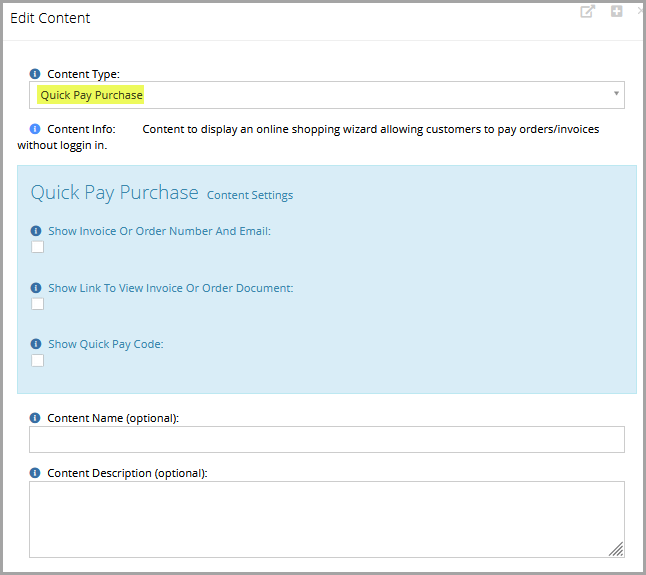
Configure the Quick Pay Purchase web content. For more information, see Web Content - Quick Pay Purchase.
-
Save and Publish the page.
Enabling Quick Pay System-Wide
-
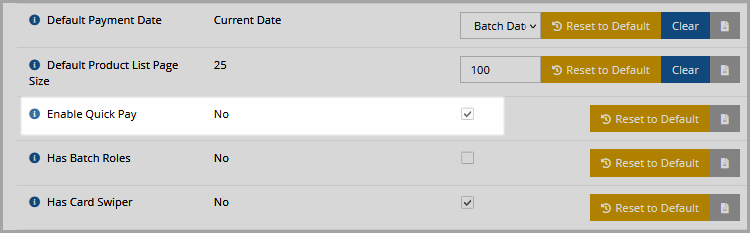
Navigate to the Configurations App > Settings > Shopping section.
-
Locate and enable the Enable Quick Pay check box.
-
Save changes.
When Quick Pay is enabled, orders and invoices will display a quick pay link, as well as a quick pay code.
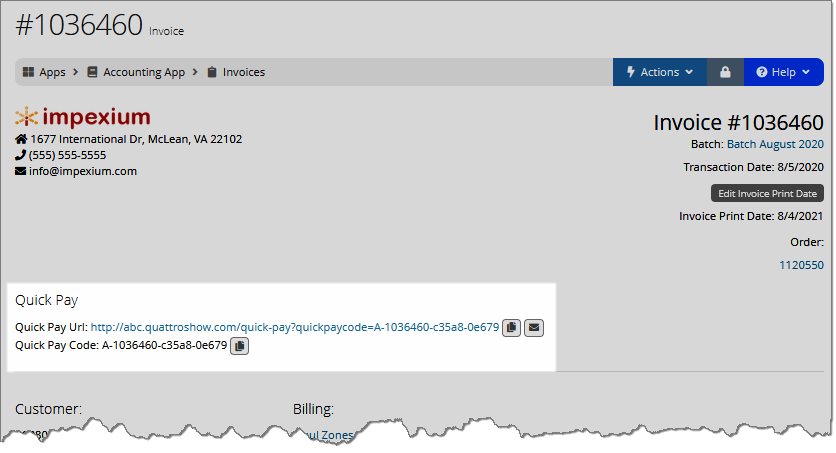
In the Invoice pictured above, note the Quick Pay URL—the copy and email icons allow staff to quickly share a link to pay that invoice without logging in. The Quick Pay Code alone can also be copied and shared with an anonymous payer.
For more on using Quick Pay once it is configured, please see Using Quick Pay.